Showing posts with label buttons. Show all posts

Friday, November 2, 2012

Feature Friday - Mel Smith Designs

Today I am introducing a new feature.. Feature Friday.

I thought it would be really nice to dedicate a day on the blog to featuring designers I know and/or whose work I admire! I mean who doesn't love some gorgeous work on a Friday?

Today our *first* featured designer is..

Mel Smith Designs

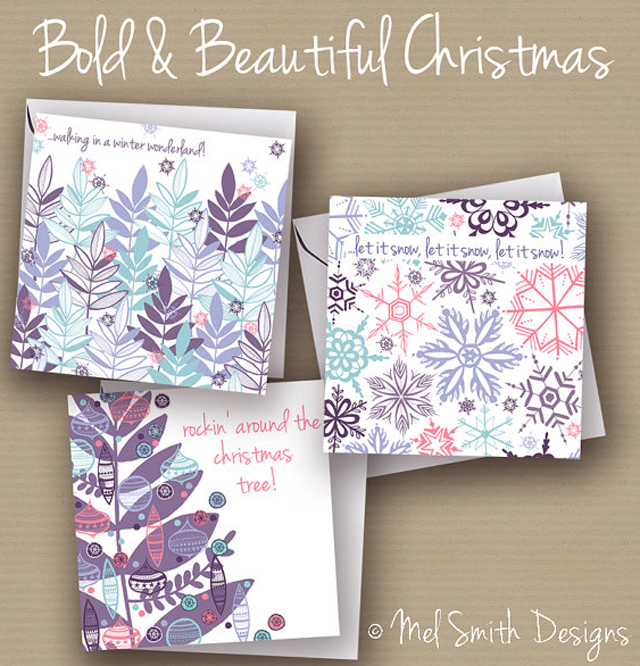
I first came across Mel's work on Society6 where the design below from her 'bold & beautiful' collection caught my eye. Mel like me is a massive fan of colour and I love her use of it. This pattern really does make my heart sing!


Mel describes her style and process of working..

"My work is quite graphic but I like to keep a hand drawn feel to it all. Everything starts as quick doodles, later tidied up with neater sketches and then finally scanned into Photoshop for recolouring and creating my patterns. I could change the colour of some of my designs all day - I think colour grabs my attention first when I'm looking around shops - and think this aspect of the design is just as important as the pattern itself, if not more sometimes."


"I love retro graphics and mid-century design, as well as the whole Scandinavian look, so I think all of these styles are incorporated into my work in one way or another."


 Mel sells handmade greetings cards, magnets, buttons, earrings, rings, notebooks and more in her Etsy store


"My Bold &  beautiful and Black Border ranges have been received well in recent months and I have a variety of handmade products available in these designs. I also have wallpapers, iPhone cases, canvases, and laptop skins available from online shops Wallpapered.com and Society6" (links below)


Mel is currently open to/looking for commissioned work, so please contact her via her website.

Hope everyone enjoyed the first feature friday! Thanks Mel for sharing your work with us! If anyone is interested in having their work featured in the coming weeks please contact me on twitter (@rosie_simons)

All images copyright Mel Smith Designs

Tuesday, June 14, 2011

Yesterday I made..

A fabric covered magnet board!

I wanted to make something for my friends birthday, she loves to have photos up on her wall and pink polka dot fabric, so I came up with the idea of making a fabric covered board with button magnets.

I chose pastel pink fabric with small white polka dots, and large pastel buttons in pink, purple, blue, yellow, orange and green. The fabric I bought on eBay because I don't live close to any good fabric stores, I used favouritefabrics who have an amazing selection of fabrics available. I also purchased the magnets and buttons on eBay as it is a quick and easy way to get supplies, and cheap at just £4 for 100g of buttons and £2 for 50 magnets! The board itself came from IKEA and can be found here, it comes in silver or white, and I chose white as I didn't want the metal to effect the colour of the fabric.

I cut a piece of fabric which was a few inches bigger than the board itself and used a glue gun to glue the fabric to the back of the board, making sure the fabric was pulled tight across the front. Using the glue gun was frustrating as you'd put glue half the way and then it would have dried before you had time to wait for the glue gun to melt more glue and then put it on! I think next to I would buy very strong, very sticky double sided tape to use as it doesn't dry out and is quicker and easier to apply!

Below are a few pictures, I didn't have much time between making it and giving it as a gift so they are only quick pictures!


Thursday, May 26, 2011

Today I made..

Fabric bowls!

Whilst browsing Etsy I saw some really beautiful fabric bowls and thought.. I'd like to do that! So I found an online tutorial, grabbed myself some cord and strips of fabric and away I went. I used the tutorial by Linda Permann on craftstylish.com which you can find HERE!

Technically you are supposed to use cotton 'clothesline' but this doesn't seem to exist in the UK, so instead I used piping cord. Picked up 3 metres of 5mm cord from John Lewis, at £1 a metre, thought this wasn't too bad but as I started to swirl round making the bowl I realised that 3 metres wasn't going to go very far! Each of the small bowls below measure about 3 inches across at the top and are approximately 1 inch tall, they took 1.5 metres of cord each to make! So if you're going to try this make sure you have lots of cord before you start!


So simple! All you need is a sewing machine, some cord and few bits of fabric, you can use bits of different fabrics if you want to mix the colours up!

I've ordered 100M of cord so will be making some larger bowls when that arrives and will upload some more pictures!